Cyrozap's Tech Projects

Computers. Circuits. Code.

Unicorn Pen Plotter Dedicated Controller Board

I just ordered 10 of the Minimalist Unicorn Controller Boards that I designed. Total cost was around $34 from SeeedStudio, so that's about $3.40 per board. If you want, I can send you one for the cost of the board + shipping. I really only want one for my Unicorn (still haven't used it) so I kinda want to offset that cost a bit. I'll be ordering the components tomorrow so I'll let you know what the electronic bits cost then. Sorry about this post's grammar—it's late but I really wanted to get this out tonight.

Update: This is essentially just the extruder controller with all the unnecessary bits removed. The benefits of this board are that it is (theoretically) cheaper than the EC board and it's smaller than the EC board but it still has the plug-and-play RS485+Power port.

Update 2: Remember, this is just the PCB I'm selling, nothing else—no components. You all knew that, though. Right?
My New Old Macintosh SE

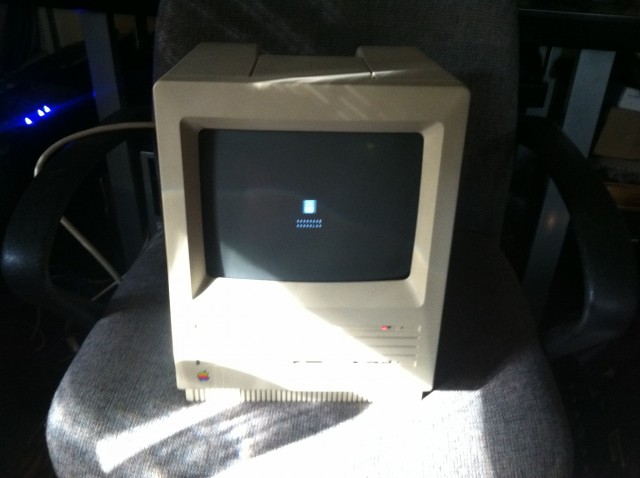
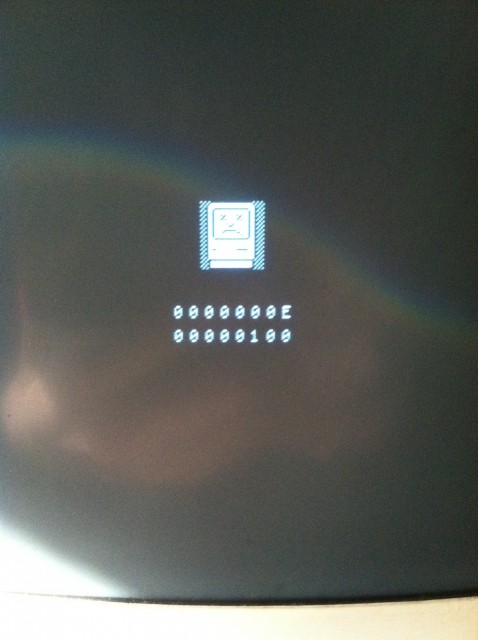
Today, I got a free Macintosh SE! It's pretty awesome. Unfortunately, it's giving me a RAM error, so I'll have to swap out the modules. I'm going to try to fix it to the best of my ability because to gut a fixable machine would be to destroy a piece of Apple history. I'm thinking about replacing some of the components with more reliable modern equivalents, too. Now that I think of it, I might just go ahead and replace all the capacitors before they start leaking and ruin the board. If I can, I'll also replace the floppy drive with an SD card-based floppy drive emulator.

Cheap-o LM8UU Bearings on Ebay

Today, I bought some linear bearings (against Spacexula's recommendation). I got the 12 el-cheapo LM8UU bearings on ebay for $18 because I figured they might work better than brass bushings. If they don't, $18 isn't a huge loss. I heard there are some small issues with the cheap bearings, but I think I'll be fine.

While I wait for the bearings to arrive, I will be cutting the threaded rods down to size and I'll begin assembling the machine.

It has begun...

Well, I finally pulled the metaphorical trigger and bought the hardware for my SAE Prusa Mendel. It's so exciting! I probably overpaid ($73.88 + shipping), but it was nice to get everything all at once from McMaster-Carr (I don't have a hardware store near me that sells the rods or belts). Once I get the hardware (sometime next week) I'll start building the frame.

Things are getting interesting...

Prusa Mendel X-Carriage

This is the day you will always remember as the day I FINALLY PRINTED THE PRUSA X-CARRIAGE!

If you can't tell, I'm really excited. It turns out that the missing ingredient to my MakerBotting success was some isopropyl alcohol (70%, a.k.a. rubbing alcohol) to clean oils off of the build platform. Once I cleaned the platform, prints started sticking like they did when I first upgraded to the HBP. It's AWESOME.

Now that I've gotten the x-carriage printed, the rest of the parts should be easy by comparison. Once I get them printed, I'll start buying the hardware for the new machine.

Sprint Airave Teardown

Got my hands on a Sprint Airave (full model number SPDSC26UCS) in the hopes of being able to hack it, but the FPGA ended up being an Altera HardCopy II chip, which is basically an FPGA that is hard-coded to remove the FP (Field Programmable) functionality.

So, not wanting to waste a $40 investment, I decided to take pictures of the insides in the hopes that it will help someone figure out some hacks for it.

If you need more-detailed pictures, let me know and I'll be happy to take them for you. I hope to get some logic analyzing going at some point so I can spoof the GPS data.

No more ads! Yay! Sorta...

Well, ads don't seem to be making me any money. Because of this, I figured that I might as well get rid of them.

In place of ads, I now have Flattr buttons! Yay!

Like a post? Flatter it! There are now Flattr buttons at the end of every post. I'm sure you won't mind.

Maker Faire NY 2011 Was Awesome

Well, it was! I met some really cool people this year and it's always great to put faces to names.

I was amazed by Andrew Diehl's "Fablicator" and the double-tall Ultimaker—these things are game changers. I can see the Fablicator directly competing with 3D System's lowest-cost pre-assembled printers and MakerBot's pre-assembled Thing-O-Matic, and it's really an amazing deal considering the Fablicator is made out of aluminum and it includes a computer with all the software pre-installed.

A lot of people have been saying that I'm getting great quality for a batch 5 MakerBot with a DC extruder. I think so, too, but I would love it if it was better. I believe the majority of my printing problems are due to my use of the DC gearmotor. With a stepper extruder, I would be able to get much finer control over the flowrate, thus fixing a lot of my perimeter adhesion and excess infill problems.

I posted the pictures I took at the Faire on my Picasa Web Albums. Bonus feature: I geotagged most of the pictures using my DIY Nikon GPS.

MakerBot Controller iOS App

I made an app that can hackishly control a MakerBot! Code is here. Clone via Git, open and compile with XCode 4.

I say "hackishly" because it only works on the X-axis right now and it only supports absolute coordinates. Eventually, I want this to become a full ReplicatorG implementation so you won't need a computer to control a MakerBot.

You need a Redpark serial cable and EITHER a provisioned iOS device and developer program membership OR a jailbroken iOS device and modified XCode. I have the latter.

If you want to help the development, feel free to fork the repository and do any dev work you want! This is a great resource to use. I really do need help with this because my coding skills are less than adequate.